How to Can Pumpkin: 7 Steps for Long-Term Pumpkin Storage
Written by MasterClass
Last updated: Jan 5, 2022 • 4 min read
Halloween jack-o’-lanterns and pumpkin pie spice might make you recall fall, but you can store fresh pumpkin long beyond that season. Consider these tips as you learn how to can pumpkin.

Learn From the Best
What Is Canned Pumpkin?
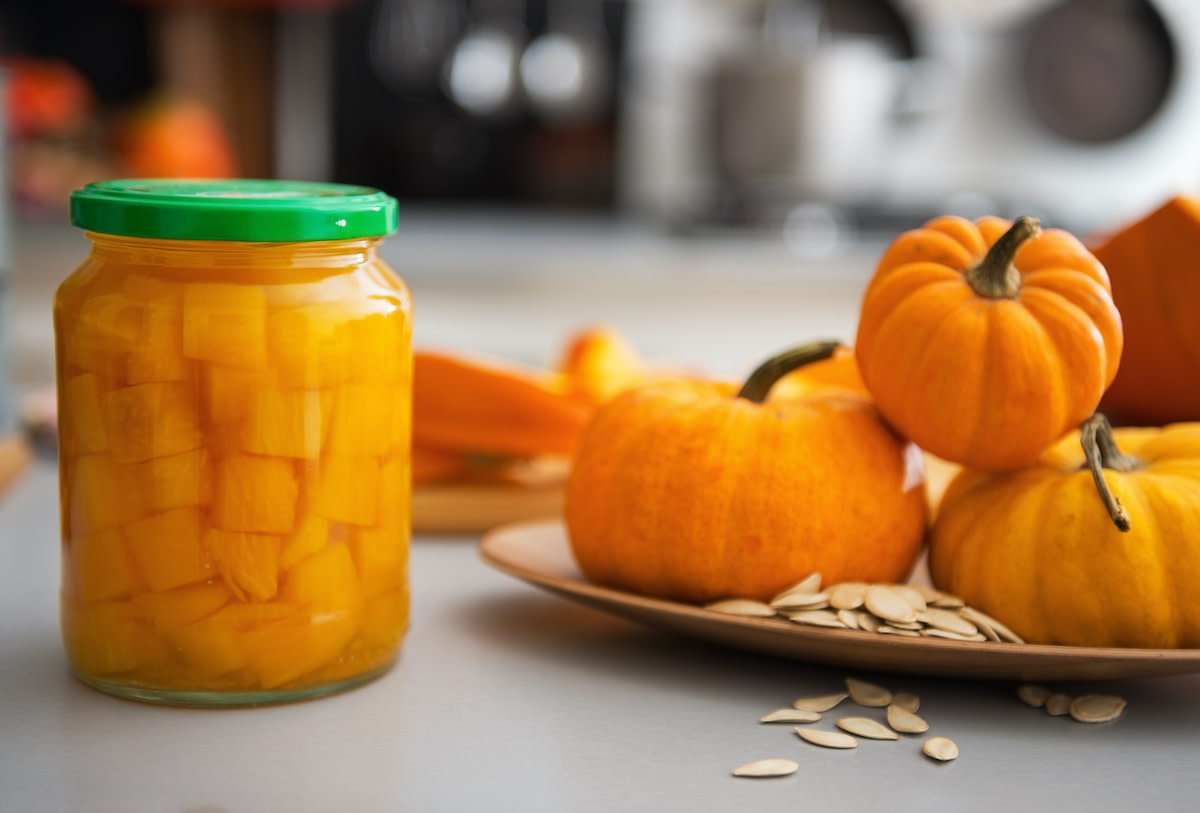
Canned pumpkin is pumpkin stored in pint or quart jars to extend its shelf life. Like winter or butternut squash, pumpkins are members of the Cucurbitaceae plant family and serve as an adequate source of carbohydrates, vitamin A, vitamin C, and other nutrients.
To can pumpkins, you’ll need to use a pressure canner rather than a water bath canner. You can find fresh pumpkins to can at farmers’ markets and grocery stores throughout the fall season.
How Do You Preserve Pumpkin in Cans?
Preserving pumpkins in cans means adhering to the pressure canning method. If you try water bath canning instead, you won’t successfully prevent botulism spores (a toxic bacteria) from growing on these low-acid foods. Putting your jars in a pressure cooker before storing them helps kill off this bacteria with heat. This form of pressure canning also helps your pumpkins last up to a year and a half. You should refrain from canning pumpkin purée because neither water bath canning or pressure canning will suffice to remove bacterial concerns. Instead, opt to place cubed pumpkins in your jars, and freeze pumpkin purée as a long-term storage alternative.
5 Potential Canned Pumpkin Recipes
After you can pumpkins, you can use them to make all types of pumpkin recipes throughout the whole year. Here are just five ideas you can try:
- 1. Pumpkin bread: Use the pumpkin chunks in your cans at a later date to add their trademark flavor to moist, fluffy pumpkin bread. Add icing for extra flavor.
- 2. Pumpkin butter: After you’re done carving pumpkins for Halloween, keep some home canned pumpkin cubes and roasted pumpkin seeds to make this kind of butter. Spread it like a peanut or almond butter alternative on toast.
- 3. Pumpkin pie: If you don’t like waiting all year for pumpkin pie to hit the shelves, keep your own pumpkin cubes in cans. That way you can bake pumpkin pie on parchment paper with a baking sheet at any time of your choosing throughout the year. Many bakers use smaller “pie pumpkins” for this purpose, but any kind will do.
- 4. Pumpkin purée: Even though you can’t store a canned pumpkin purée, you can use the cubes in your cans to quickly make this multipurpose ingredient. Take the cubes out of your cans, throw them in a food processor, and use them to make this treat as an applesauce alternative or pie filling.
- 5. Pumpkin soup: Make a homemade pumpkin soup anytime you want after you store canned pumpkins. You can remove them from their pressurized containers and whip up the soup in a short amount of prep time.
7 Steps to Home Canning Pumpkins
To can pumpkins, you’ll need a pressurizer, pumpkins, and plenty of hot water. Follow this seven-step pumpkin canning process:
- 1. Cut open the pumpkin. Cut a circle in the top of the gourd as if you were about to start the process of carving a jack-o’-lantern. Chop the pumpkin into multiple sections to make it easier to discard all the pulpy insides so you can get to the flesh you’ll use in recipes.
- 2. Empty the insides. Scoop out the stringy material manually or with spoons until you’re left with just the flesh and the rind. Keep some of the seeds if you plan to make a recipe that requires them or if you want to plant pumpkins of your own. Use a vegetable peeler to get rid of the exterior skin.
- 3. Chop up the pumpkin flesh. Begin to dice all the cut sides of the pumpkin flesh into one-inch cubes. Do this until you have enough to fill up the cans you have set aside.
- 4. Blanch the pumpkin pieces. Place the pumpkin cubes in boiling water for about two minutes. As they go through this blanching, use hot water to heat your glass cans to avoid an overwhelming temperature shift when you add the hot pumpkin pieces. A drastic change in temperature could cause the glass to crack.
- 5. Place the pumpkin in heated jars. Take the cubed pumpkin pieces and scoop them into the canning jars, leaving a one-inch headspace between the top of the jar and the pumpkin bits themselves. Once you’ve done so, pour in hot water up to that one inch of headspace as well. Use a kitchen tool to poke at and remove air bubbles before you seal the jars.
- 6. Add the jars to a pressure cooker. Place the lids and rings on each of your jars as you heat your pressure cooker on the stove. Use a jar lifter to add the jars to this pressure canner to prevent yourself from getting burned. If you’re using pint jars, keep them inside the canner for about an hour; for quart jars, do about ninety minutes of cook time. Keep an eye on the dial gauge—you want the setting to be around eleven pounds of pressure.
- 7. Cool the jars and store them. Use some form of lifter to get the jars out of the pressurizer. Place them on a washcloth and allow the hot jars to cool at room temperature. After they cool, press on the top of the lid to see if it gives at all—if it doesn’t, it’s appropriately pressurized. Store the cooked pumpkin cubes until you’re ready to use them.
Want to Learn More About Cooking?
Become a better chef with the MasterClass Annual Membership. Gain access to exclusive video lessons taught by the world’s best, including Alice Waters, Gabriela Cámara, Niki Nakayama, Chef Thomas Keller, Gordon Ramsay, Yotam Ottolenghi, Dominique Ansel, and more.